


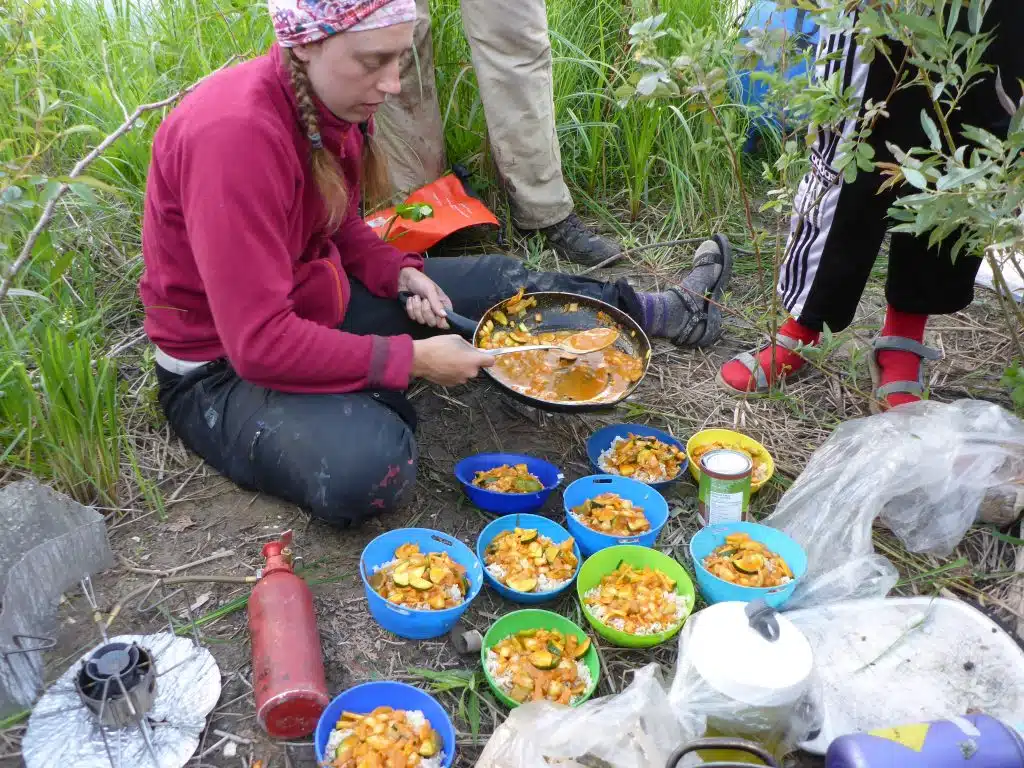
When I was a canoe guide, a large share of trip preparation came down to food. I was leading trips ranging two to four weeks, meaning I needed to pack food which was healthy, wouldn’t spoil and was very affordable (as I was working for a non-profit camp).
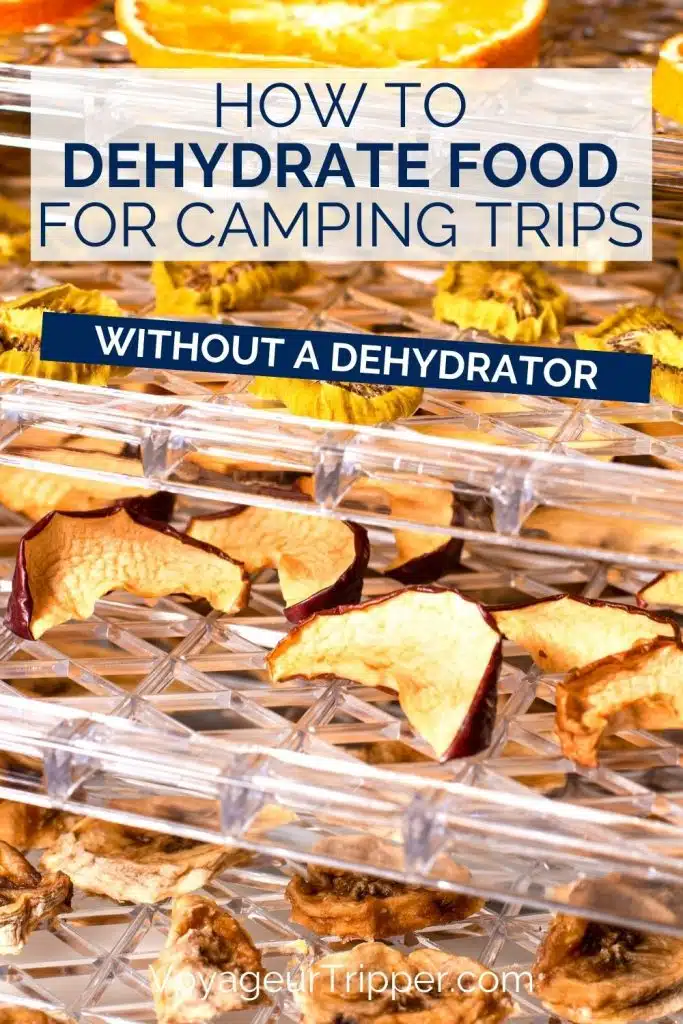
It was through canoe guiding I learned the variety of foods you can dehydrate – all without a fancy, expensive dehydrator. In this post I’ll explain how to dehydrate food for camping meals using little more than a baking sheet, parchment paper and regular oven.
All of this info (plus a ton more) is found in The Voyageur’s Backcountry Cookbook.

This post may contain affiliate links. If you make a purchase through one of these links, I may receive a small commission at no extra cost to you. Your support is much appreciated! You can learn more by reading my full disclosure.
How to dehydrate food for camping meals (without a dehydrator)
Grab yourself a coffee, sit back and get ready for a long but super helpful post. I’m going to go over what you need to dehydrate without a dehydrator and then give a detailed how-to for dehydrating just about every food you could want to dehydrate. Let’s get started.
Get ready: What you need to start dehydrating
You don’t need a lot of start dehydrating. The following items will allow you to dehydrate just about anything you can imagine.
- Oven – set to the lowest temperature possible (usually 170 F)
- Baking sheets
- Parchment paper (NOT wax paper – I’ve made this mistake before)
- Depending on what you’re dehydrating, you may need a cutting board & knife, spatula, can opener or large spoon
- Plastic bags (anyone got recommendations for reusable bags?)
Note: While I do all my dehydrating in the oven, this is an energy-intensive method. A proper dehydrator will consume less energy and dehydrate food faster.
How long should you dehydrate for?
A common misconception is that there is a standard cook time for dehydration. How thin the vegetables are cut, how low your oven goes, the water content of the specific food – all of these will influence the time it takes to dehydrate.
I have found most vegetables take between 5 and 7 hours to dehydrate, whereas fruit and sauces can take over 8 hours. For vegetables, I recommend you check on the food after 4 hours and then in one hour intervals until they are done.
For fruits and sauces, I recommend you check after 6 hours and then in one hour intervals until they are done.
Keep in mind: The food closest to the heat source will dehydrate faster (usually either the top of bottom of the oven). One hack is to rotate the top and bottom racks halfway through. But I never remember to do that and just end up checking periodically and taking out the trays as they finish.
Once you are more experienced with dehydrating food and know your oven well, you will be able to better predict how long to let the food cook. Anyways… back to the veggies.
>>All of these steps, plus recipes to make with dehydrating food, is in the cookbook I wrote, The Voyageur’s Backcountry Cookbook.
Dehydrating vegetables
Vegetables are the lion’s share of what I dehydrate. On my long canoe trips, fresh veggies last maybe a week, so anything after that has to be dehydrated. I find dehydrated vegetables are excellent in chili, soup, pasta, curry, stir fry – you name it! So, what vegetables can you dehydrate?
- Peas and carrots
- Zucchini
- Peppers
- Onions
- Mushrooms
- Spinach
- Sweet potato
- The list goes on and on….
I have yet to find a vegetable I couldn’t dehydrate (well, besides lettuce and cucumber, those didn’t turn out). The methodology is the same regardless of the vegetable you are dehydrating. This means you can easily experiment with other types of vegetables than the ones above. You want to ensure the veggies are thin and spread out on parchment paper on the baking sheet.
Preparation: For vegetables, most of the preparation is in the chopping. You want each piece of vegetable to be small and thin. Otherwise, the vegetables will take a really long time to dehydrate (or if they’re really thick, they won’t dehydrate at all).
For veggies like onions, mushrooms and peppers, cut thinly to ensure each piece is less than half an inch thick. For sweet potato and carrots, cut the veggies as thin as possible – ideally less than a quarter inch thick.
Once chopped, lay out the veggies on the parchment paper so that they are not overlapping. For kale, you will need to do some chopping, but spinach can be placed directly on the parchment paper.
For both kale and spinach, it’s alright if they are overlapping a bit because they are so thin already.
Dehydrating: With the veggies laid out evenly on the parchment paper covered baking sheet, put them in the oven. As mentioned above, the cook time will be around 6 or 7 hours. For kale and spinach, you will probably only need 4 or 5 hours since they are so thin and don’t contain a lot of water to begin with.
Re-hydrating: I’ll be honest with you, re-hydrating vegetables takes a bit of practice and a bit of patience. If you’ve ever read “just add boiling water” you will be eating soggy vegetables. Instead, follow these instructions:
To re-hydrate vegetables on their own, add the vegetables to a pan or pot with a small amount of water and heat. As the vegetables absorb water, add some more. Continue doing this until the vegetables and cooked and firm. This strategy will get your vegetables as fresh-like as possible.
Alternatively, you can re-hydrate the vegetables at the same time as re-hydrating sauce (see below) or you can put soup mix in the water to provide some flavour.
If I’m feeling lazy, I’ll toss handfuls of dehydrated vegetables in a pot of cooking rice or pasta noodles (sometimes they turn out soggy though). The best strategy is to re-hydrate vegetables slowly and on their own.

Dehydrating fruits
I love dehydrated fruit for snacks during the day or additions to oatmeal and desserts. Unlike vegetables, most fruits have too much water in them to dehydrate nicely. Watermelon, for example, wouldn’t exactly work. So what fruits can you dehydrate?
- Sliced apples (try sprinkling cinnamon on the slices before dehydrating!)
- Canned pineapple and peaches
- Strawberries and blueberries
Preparation: For apples and strawberries, cut into thin slices and place on the parchment-paper-baking-sheet. Blueberries can be scattered directly on the sheet. For canned fruits, drain and rinse before scattering on the sheet.
Dehydrating: Place in the oven for 7 to 8 hours (though I recommend checking on them after 6 to be safe). Pro tip: You can put trays of fruits and vegetables in the oven at the same time, just don’t do this with onion. I don’t know how but fruits seems to pick up the onion aroma and get a slightly weird taste to them.
Rehydrating: To be honest, I never rehydrate fruit. It just gets soggy and weird. Instead I either snack on the dried fruit or throw them in oatmeal or desserts.
Read More: How to Make Oatmeal Less Boring on Camping Trips

Dehydrating apple sauce for fruit leather
Preparation: This is a personal favourite of mine. In a large bowl, pour a big jar of apple sauce. Add spices like cinnamon or nutmeg to suit your preferences and stir everything.
Once mixed, scoop the apple sauce onto the parchment paper and use a spatula to spread the sauce evenly throughout the pan. You want the apple sauce to be in a thin layer on the baking sheet, but without any holes or areas so thin you can see through to the parchment paper underneath. Fruit leather is a great place to experiment too – you could try putting other spices in with the apple sauce, add coconut shavings. Get creative!
Dehydrating: Throw in the oven, check back in 6 hours. You will probably need 7 or 8 hours. Once it’s done, peel the leather off and place it in plastic bags.
Rehydrating: No need to rehydrate because it fruit leather!

Dehydrating humus, pasta sauce and salsa
Preparation: The steps for dehydrating pasta sauce and salsa is very similar to the above. Pour either the humus, pasta sauce or salsa onto the parchment paper and use a spatula to spread it in a thin, even layer across the entire baking sheet. Ensure there are no holes.
Dehydrating: Place in the oven. Check back in five hours (sorry these instructions are getting so repetitive). Once the humus / pasta sauce / salsa is done, in the oven leave it out to cool completely. Once it is cool, you can peel it off the parchment paper and put it in plastic bags.
The pasta sauce and salsa tends to hold together well (like fruit leather) and you can peel it in strips before placing in the plastic bag. Humus, on the other hand, is more like a thick powder and will crumble when you take it off the parchment paper. And that’s okay! Just put all the crumbs into a plastic bag and when you add water later on it will take on its humus texture once more.
Rehydrating: For sauces, place the dehydrated strips in a pot and add less water than you think you’ll need. Stir constantly (burn pasta sauce is the worst). If you need to add more water, do so once the existing water has been absorbed already. Humus is easier. Just place the crumbled humus in a bowl and slowly add water while stirring.

Dehydrating beans and chickpeas
Preparation: Okay, so beans and chickpeas are the easiest foods to dehydrate. Simply open a can, rinse them with water and pour onto a baking sheet. Smooth them out and place in the oven. Easy-peasy!
Dehydrating: Check on the beans after 4 hours. They will probably need 5 to 6 hours. You’ll know they’re done when they’re crispy and crumbly. Lift up the parchment paper and fold it into a U shape so the beans fall to the centre. Then pour into a plastic bag.
Rehydrating: Start rehydrating beans in water over heat. Once they look a little rehydrated, but not done yet, you can add in sauce and veggies. I recommend only eating dehydrating beans in sauce (like a chili). They just don’t taste great otherwise. Pro tip: You can also dehydrate refined beans the way you would pasta sauce. This makes for great burritos!
And that’s just about everything you need to know to dehydrate food for camping meals! I hope this has been a helpful guide. Please leave any questions you have in the comments below.
There are tons of recipes you can make with dehydrated food. Check out my backcountry cookbook for more than 35 recipes, food prep, packing, cooking tips, and how to dehydrate ground beef for even heartier meals.
More camping resources:
- The Camper’s Guide on How to Poop in the Woods
- The Ultimate Guide to Canoe Camping
- The Camper’s Guide to Staying Clean While Camping
- 10 Tips for Comfortably Sleeping in a Tent


Stay in Touch
Join our community of outdoor adventurers - you'll find trip inspiration, gear discussions, route recommendations, new friends and more!
Watermelon works just fine! I dehydrate some every year, using the oven method. It takes time but the end result is delicious. It’s in my top 3 favourite dried fruits, along with kiwi and mango.
That’s great to know! I’ll give it a try sometime!