
If you think the Vancouver – Whistler area is only good for hiking and skiing, you may be surprised that it has WAY more to offer than that. I’ve previously written about activities like whitewater rafting, snowmobiling, and zip-lining – activities that get you outside, but in new and engaging ways.
Well, the Via Ferrata Whistler experience is no different. Not only will you reach the top of Whistler Peak, surrounded by one of the most beautiful mountain ranges in the world, but you’ll do so in an exciting (but also safe and accessible) way.
In this blog post, I’ll share my experience on this Via Ferrata tour. I’ll go over each part of the tour, what to bring, and some miscellaneous tips for having the best experience.

This post may contain affiliate links. If you make a purchase through one of these links, I may receive a small commission at no extra cost to you. Your support is much appreciated! You can learn more by reading my full disclosure.
Quick Facts about Whistler Via Ferrata
Here are the quick facts about the activity.
- Time: 4 hours
- Distance: 4 km
- Elevation Gain: 260 m
- Fitness Level: Moderate
Via Ferrata: The In-Between of Hiking & Climbing
I think Via Ferrata is an excellent option for anyone who has grown a little tired of hiking and doesn’t have the experience for rock climbing. You get to use your full body in novel movements, regularly thinking about where to place your hands and feet to best climb up the side of a mountain, but you don’t have to have a lot of upper body strength. That makes it much more accessible than regular rock climbing, but still much more engaging than hiking.
The Whistler Via Ferrata Experience
Gondola to the Rendez-Vous
The meeting point is at the Mountain Skills Academy hut, which is halfway up Whistler. So the adventure starts before you even meet the group.
Our ticket included the gondola lift ticket, and you can take any gondola up the mountain before the tour (you can also purchase a tour ticket that doesn’t include the gondola left ticket if you already have one / have a season’s pass).
Due to the last-minute nature of our decision to do the tour, we didn’t have any time to spare – we jumped on the next gondola up that would get us to the top with about 5 minutes to spare!
Click here to learn more about the Whistler Via Ferrata Tour


Getting the Geared Up
We met our guide at the hut to be outfitter outfitted. Probably running shoes / hiking shoes are required for the tour (if you don’t have any, they have extras you can use at no additional charge). We were fitted for a helmet and a harness.
Due to the nature of the climb, they discourage cameras and backpacks that don’t have hip/sternum straps. Not being able to bring my camera was slightly disappointing, but it would have been such a pain to carry.
Hiking to the Base
Once we were suited up (and sunscreen-ed up), we were ready to hit the trail. The tour starts with a short hike to the base of the climb. Even in early July, there was still snow on either side of the trail, and there was one section where we had to walk over the snow.
The hike only had a small gradient to the hike, and the snowy section was very very short, so if you’ve done some hiking before, you’ll be fine.

Whistler Via Ferrata: Pitches 1 and 2
The great this about this particular Via Ferrata is that it’s been built to be progressive. The first pitch is very easy, and the second is a little more difficult.
The first two pitches had lots of wide, flat-ish sections where we held onto a cable. In between these sections were short climbs using rebar ladders. For the most part, the cable was always very close to the rungs and it was easy to switch between cable sections.


Whistler Via Ferrata: Pitches 3 and 4
As we progressed to the third and fourth pitches, the difficulty increased further. There were fewer flat sections – it was almost entirely climbing and the cliff was more verticle.
There were also a few sections with limited rebar ladders, so in addition to using those as steps, we had to use notches in the cliff face. I thought this might be a little challenging, but by the time we got to this part, the climbing and cables were so familiar that it was fun to freestyle a bit.
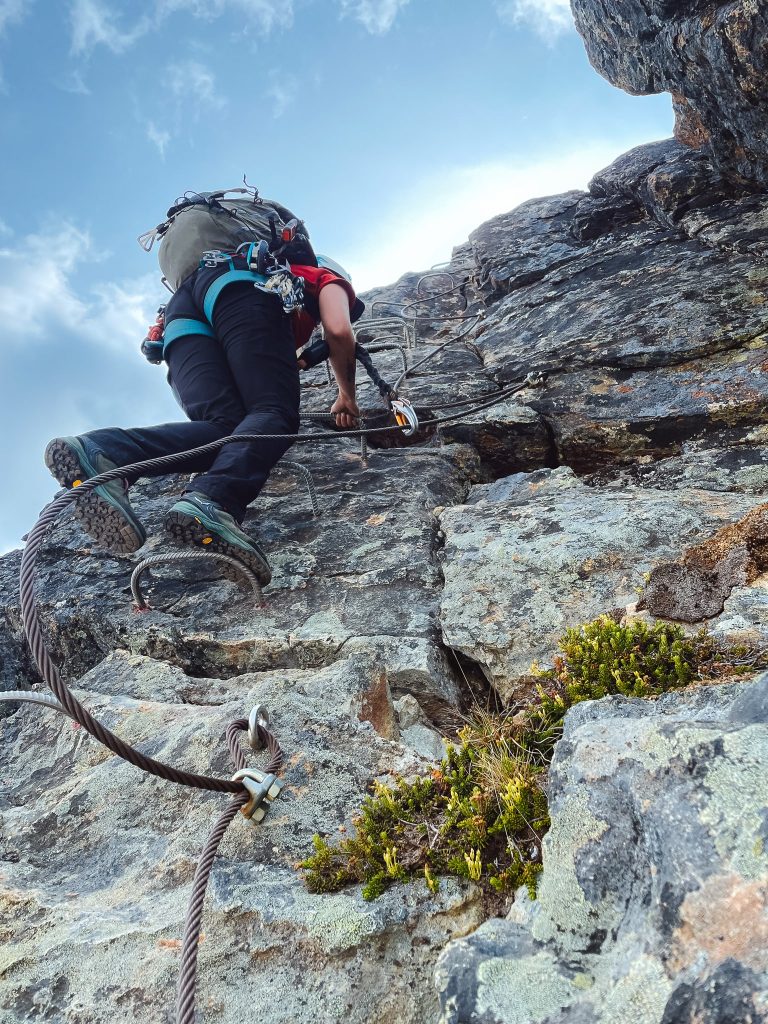
One of my favourite parts was a section where we had to traverse laterally – there was no rebar to hold onto, just the rocks and cables.
Throughout the journey up the mountain, I had to remember to turn around and appreciate the views that were behind me. I also found that, because I was grabbing onto rocks and so close to the cliff face, I could better appreciate the small plants and flowers growing on the side of the cliff. This is something I sometimes overlook when I’m hiking.
Click here to learn more about the Whistler Via Ferrata Tour


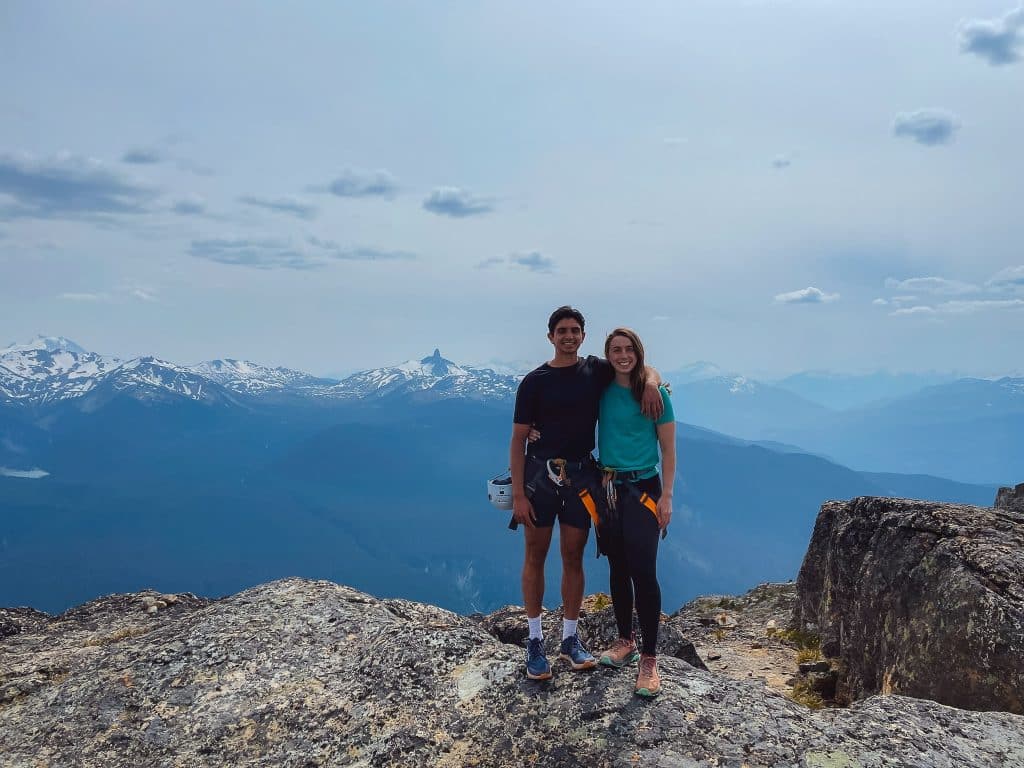
Whistler Peak
We spent about 15 minutes exploring the top of Whistler Peak. There is a suspension bridge at the very top that goes over a cliff (which was really cool when I first came to Whistler three years ago but was less cool having just climbed a cliff to the peak!).
If you haven’t been to the top of Whistler yet, be sure to look out for Black Tusk, the core of a volcano that stands out among the peaks of the mountain range (visible in the photo below).
After enjoying the top for a bit, we took the gondola back down to the hut. Here we returned the harness and helmet, picked up our stuff, and then took the gondola back to town.
Is Via Ferrata safe?
Every outdoor activity comes with risk, but Via Ferrata is generally very safe – especially when doing it guided and at Whistler. Our guide was extremely knowledgeable, experienced, and had a long list of certifications to prove she knew what we was doing.
You have two carabiners, so at least one is connected at all times. The single carabiner and rope is more than strong enough to hold your weight if you were to slip. As mentioned above, the reason you have two carabiners is so that one is always attached, even when you are transferring between cable sections.
This part – the unclipping and reclipping carabiners between cable sections – is the most dangerous part of Via Ferrata. If you unclip both at the same time, there is a risk you could fall. But you would have to be very careless to do that – the carabiners are very easy to use when switching between sections.
All that to say, Via Ferrata with a guide is extremely safe!

Is Via Ferrata for Beginners?
Via Ferrata is suitable for beginners with a moderate level of fitness. You do not have to have any rock climbing or mountain climbing experience to do Via Ferrata. It is a physical activity, so having a moderate level of fitness helps a lot. You should be comfortable climbing a ladder and walking on uneven terrain.
I would say, if you’re comfortable on hiking trails and aren’t afraid of hikes, you’ll have an awesome time doing Via Ferrata!

What do you need to bring to Via Ferrata Whistler?
Clothing:
- Sturdy pair of hiking boots: If you don’t have hiking boots, running shoes are okay but you can also borrow a pair from MSAA.
- Comfy, athletic quick-dry clothing: I wore leggings and a synthetic gym t-shirt. Hiking pants and also a good option. I would recommend wearing pants instead of shorts – pants are more comfortable underneath the harness.
- Extra layer: Some people in the group also brought a light jacket/sweater, but it was so warm that I didn’t this day.
Other:
- Waterbottle
- Sunscreen and sunglasses: It can be quite hot and sunny at the top of Whistler Mountain!
- Backpack: You can bring a backpack to wear on the Via Ferrata, but only if it has a hip/sternum strap so it’s secure.
- Camera: The guides told me not to bring my actual camera, but my phone worked well. You can also bring a GoPro, as some of their helmets have a GoPro mount on them.
Tip for photos: I used my phone as a camera and wore leggings with tight, side pockets so I could easily take photos in between pitches.

Via Ferrata Whistler: Final Thoughts
All in all, this was a super fun experience. I’ve done a ton of hiking, including hikes around Whistler so I wasn’t sure what to expect with this (“Is this going to just be expensive hiking?”).
But I really enjoyed this type of outdoor movement. Whereas with hiking you can zone out a little, this captivated my whole attention. I had to concentrate when shifting my harness between cables or climbing on the rebar steps. I used way more upper body muscles than I do when hiking.
Yet it wasn’t hard. No one in our group had climbing experience, but all it took was a moderate level of fitness and a smidgen of courage (and a harness and a wonderful guide) for us to climb up the side of a mountain!
I definitely recommend this for visitors to Whistler/Vancouver or BC locals wanting to mix things up! Click here to book the tour!
Stay in Touch
Join our community of outdoor adventurers - you'll find trip inspiration, gear discussions, route recommendations, new friends and more!
Is it possible to do the via ferrata as a solo person with a lot of rock climbing experience? And do I need a permit or a reservation if I do not do it with a tour?